

NOTE: THIS GUIDE APPLIES TO 2015 FULL MODE SKINS NOT FMC SKINS.
This is a simple guide to tell you how to increase the transparency of various screens in Football Manager 2015, to make it easier to see your background images or to see the pitch on the match screens better with various widgets open.
Before you start you will need a couple of things;
- If you are using the Default skins, then first download the Base Skins as any changes you make will need to be applied to them rather than the default skins, if you are using a downloaded skin then you should be able to edit that skin directly.
- You will need an image editing program that can handle transparent png files, a free option is paint.net, which I'll be using in this guide.
- You will need to have downloaded the Resource Archiver for Football Manager, this is obtained from the Library -> Tools menu in Steam. You will need to have used this tool to extract the contents of the skins.fmf file located in the data folder of where you installed Football Manager 2015.
- Have a copy of the Background image you are using in FM, if you are using changing background images pick an image.
1. First we need to copy various files that you extracted from the skins.fmf file to the graphics folder of the Base Skin (or the skin you are using). Which files you need to copy over depends on what parts of the skin you want more transparent:
The General Skin Background Overlay is located in this folder: \skins\fm-widgets\graphics\boxes\custom\background\
The Match Screen Background Overlay is located here: \skins\fm-widgets\graphics\boxes\custom\match\background\
The Match Widgets are Located here: \skins\fm-widgets\graphics\boxes\custom\match\widgets\
The Match Feed Dropdown is located here: \skins\fm-widgets\graphics\boxes\popup\match\
The Match Between Highlights Panel is located here: \skins\fm-widgets\graphics\boxes\custom\match\between highlights\
You now need to copy the files from each (or the files that you want to edit) of those folders to the same location in the Base Skin (If you are using a custom skin that already has these files present you don't need to both copying them over).
For example to edit the General Skin Background Overlay you would copy the contents of the \skins\fm-widgets\graphics\boxes\custom\background\ folder into the following location:
\skins\base_dark2015\graphics\boxes\custom\background\
\skins\base_dark2015\graphics\boxes\custom\background\
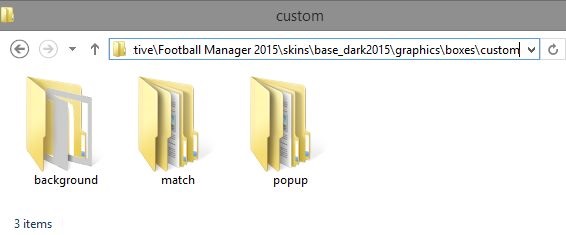
You will need to create any folders or sub-folders that don't already exist within the Base Skins folders, when done the graphics folder of your Base Skin should look something like this:
2. Next you need to determine the level of Opacity/Transparency you want the images to have, if you already know you can skip to the next step, if you are not sure the best method is to open a copy of your choosen Background image in Paint.net.
Then from the Layer Menu select Add New Layer. With the new layer selected in the layers panel select the fill tool and fill the new layer (you can adjust the RGB of this new layer to match the default in game overlay colour which is red="56" green="62" blue="82").
Now from the Layers -> Layer Properties Option adjust the Opacity of the new layer until it is at a level you are happy with. Make a note of this value.
3. With the level of Opacity now known, you can edit the actual files. If not already open, open the folder that contains the images you have copied over for example open the \skins\base_dark2015\graphics\boxes\custom\background\ folder and inside you should see a couple of files:
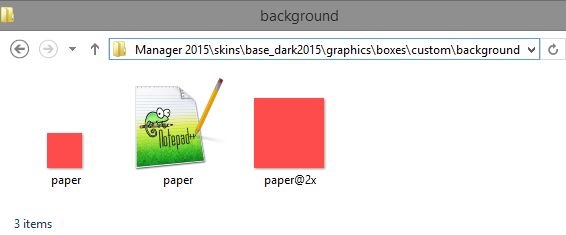
The file we care about inside here is the paper.png file (if you are planning on releasing the finished files, or use the zoom in modes you'll also want to edit the paper@2x.png file as this is the image used when zoomed in). The red/blue colour of these images doesn't matter as they are now recoloured by the game so you don't need to mess around with the colour of the images.
Now open this file in paint.net and from the Layers -> Layer Properties Option adjust the Opacity level to your desired setting, once happy save the file. BUT DO NOT EXIT PAINT.NET OR CLOSE THE IMAGE FILE you need to keep the file open so you can adjust the opacity level further if need be.
4. With the first file saved load up Football Manager 2015, and if the skin cache is on turn it off and reload your skin (if you have been using the Default Skins before this then make sure you have switched to the Base Skin). Now check that the transparency on the screens you have edited is what you want, if it is move onto the next step.
If the Opacity level isn't correct go back to paint.net and adjust the opacity again and resave the file (if you closed the file from paint.net you will need to get the orginal file you extracted as the opacity level won't be directly editable if you reopen the edited file). When done, from Football Manager go into the Preferences menu and reload your skin and check the screen again, repeat until you are happy.
5. Now with the Opacity level set up how you want it is just a case of repeating the above steps for the rest of the images you need to adjust, However to save time you can just copy some of the edited images to another folder rather than having to edit all the images, for example you'll not that the background and match background images are just red squares, so for these you just need to edit one image and copy it to the over folder if you want both images to have the same opacity.
Once you have edited all the files you want and checked them in game you are done. What I would advise is to have a save game saved just before a match as some of the match screens can only be checked during a live match. You can also apply the guide to various other panels and files in the game if you wish.
---
Redistribution Terms
You are free to post this content to your website provided:
1. It is not sold or behind a paywall.
2. You don't advertise it as being exclusive to your website.
3. My username and blog address are included: http://michaeltmurrayuk.blogspot.co.uk/
2. You don't advertise it as being exclusive to your website.
3. My username and blog address are included: http://michaeltmurrayuk.blogspot.co.uk/
 Send to Kindle